One way to help students manage overwhelm in middle school science is with reinforcement and practice activities such as Boom Cards.
Students Need Reinforcement
 You’ve seen your students look like this.
They’re overwhelmed. There’s so much input into a student’s day that they can’t remember at lunch time what they learned first period. And it just keeps piling on.
We ask students to use vocabulary and apply skills they haven’t mastered yet and sometimes they give up.
We can help them by providing engaging, self-paced reinforcement and practice activities. Let me introduce you to Boom Cards.
What are Boom Cards?
Boom Cards are interactive flash cards on a digital platform. Access to the platform is FREE, but a $35 annual upgrade allows you to monitor student activity. They are available in a very wide range of formats from multiple choice, drag and drop, label the picture, open ended, and matching, and they are available for literally EVERY science topic you can think of – everything from anatomy to zoology.
Boom card “decks” contain 10-40 (or more) task cards and a student can complete a deck in 2-5 minutes (or more).
Why I love Boom cards
- The Boom Card interface is unfamiliar but is easy to learn which students find engaging.
- If a student gets an answer wrong, they retry until they get it correct, unlike other platforms that just display the correct answer and move on.
- Speed is not a factor, unlike other review activities. Students complete a deck when they’ve gotten every question correct, not when they have practiced for a certain amount of time.
- A deck can be completed multiple times allowing for practice and reinforcement.
- A deck can be completed quickly so teachers can assign them as bellringers, end of lesson closures, or station activities.
- Boom Cards can be accessed on a wide variety of devices. Students can complete a deck while eating breakfast or on the bus.
- They are easy to create and easy to assign.
Get started with Boom Cards now.
In order to use Boom Cards, there are the following system requirements:
- To use Boom Cards, you must be connected to the Internet. Boom Cards play on modern browsers (Chrome, Safari, Firefox, and Edge). Apps are available for Android, iPads, iPhones, and Kindle Fires. For security and privacy, adults must have a Boom Learning account to use and assign Boom Cards.
- Teacher accounts: You can assign Boom Cards “Fast Pins,” (play provides instant feedback for self-grading Boom Cards). Fast Play is always a free way for students to engage with Boom Cards decks. A premium account can be purchased and will give you additional assignment options which are nice to have but not essential. If you are new to Boom Learning, you will be offered a free trial of our premium account. Read here for details: http://bit.ly/BoomTrial.
How to create an account:
- Go to https://wow.boomlearning.com/signupand click “Teacher.” Use my referral link by clicking here and save 10%.

2. Click “Join with Google” and choose your Google account, OR join with your email.

3. There are many free sets on Boomlearning.com that you can download and assign to your students. Here’s a link to a free Boom Card deck I created about plate tectonics.
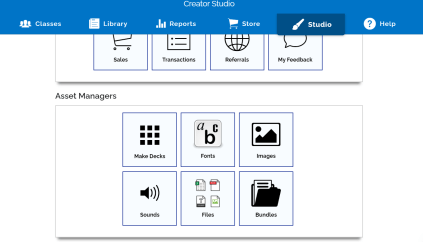
How to create your first set of Boom Cards:
- Click “Studio” then “Make Decks.”
2. Click “New Deck.”

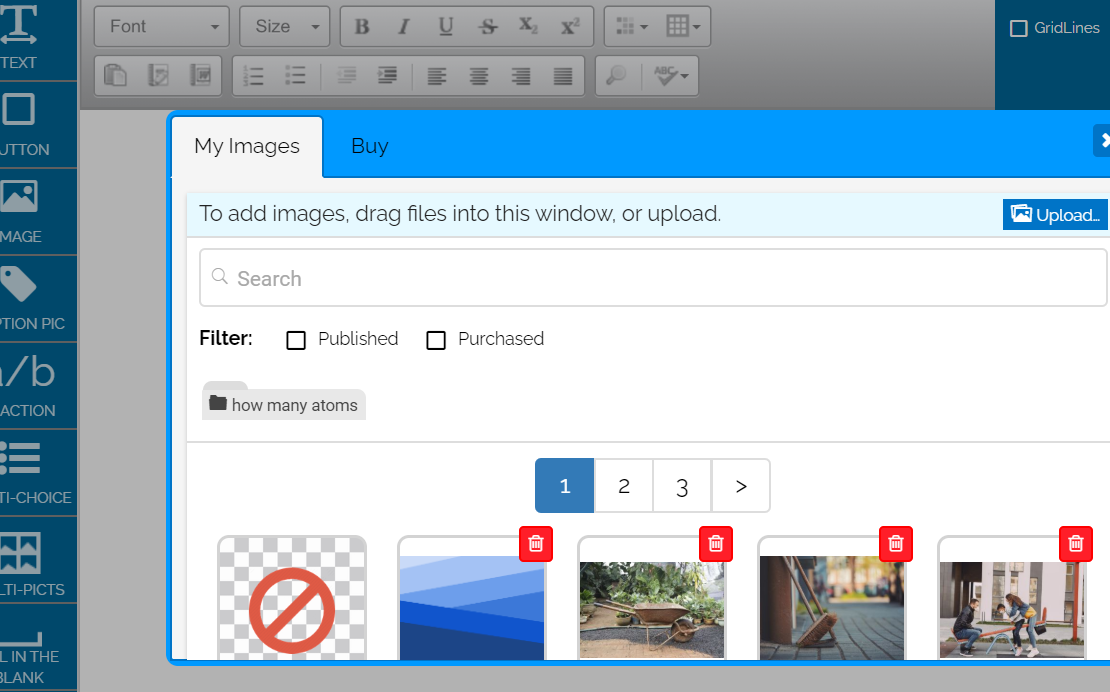
3. This is the design studio. Start by designing your template card. All components that you want in every card should be placed in the template card. Use the buttons to add text, images or buttons.
4. To add an image, click and drag the image icon onto the design space. Click “Upload an image” and select the image you want to upload. If you drag the image onto the template slide, it will be on every slide. If you only want it on some slides, then only drag it on to the slide or slides that you want.
4. Drag the Text icon and the Multiple Choice icon onto your slide if you want them to appear on every slide. You can edit the actual text and the choices on the multiple choice bar for each slide.

5. Once your satisfied with your template card, start adding questions. Use the + button to add new slides or use the copy button to duplicate a slide you already have.
6. If you want to move a part of the template for just one card, click the lock button to unlock it and then move it, delete it, or change it however you want.

7. Name your deck using the Details button.
8. Preview your deck and give it a cover image using the Preview button.

9. Preview your deck using the Preview button. You can change the cards in your deck at any time just by opening the deck.
Sharing a Boom Card Deck with Fast Play
- To play a Boom Card deck with your class, click on Library at the top of the page.

2. Click “Action” next to the deck you want to share and a pull down menu will open.

3. Choose Fast Pin which will generate a shortcut for students to play right away.

I’d love it if you’d comment below and let me know what you think of Boom Cards in middle school science!
Boom cards available in my TpT Store:
Life Science
Physical Science
- Simple Machines
- Basic Stoichiometry
- Parts of the Periodic Table
- Element Symbols #1-20
- Newton’s Laws
- States of Matter
- Atomic Structure
- Density, Mass, Volume D=M/V
- Renewable and Nonrenewable Energy Sources
- D=RT
Earth Science
- Rock Cycle
- Relative Dating
- Layers of the Atmosphere
- Weather
- 9542″ target=”_blank” rel=”noopener”>Constellations
- Solar System
- Phases of the Moon
Discover more from Just Add H2O
Subscribe to get the latest posts sent to your email.
10 thoughts on “Boom Cards in Middle School Science”